

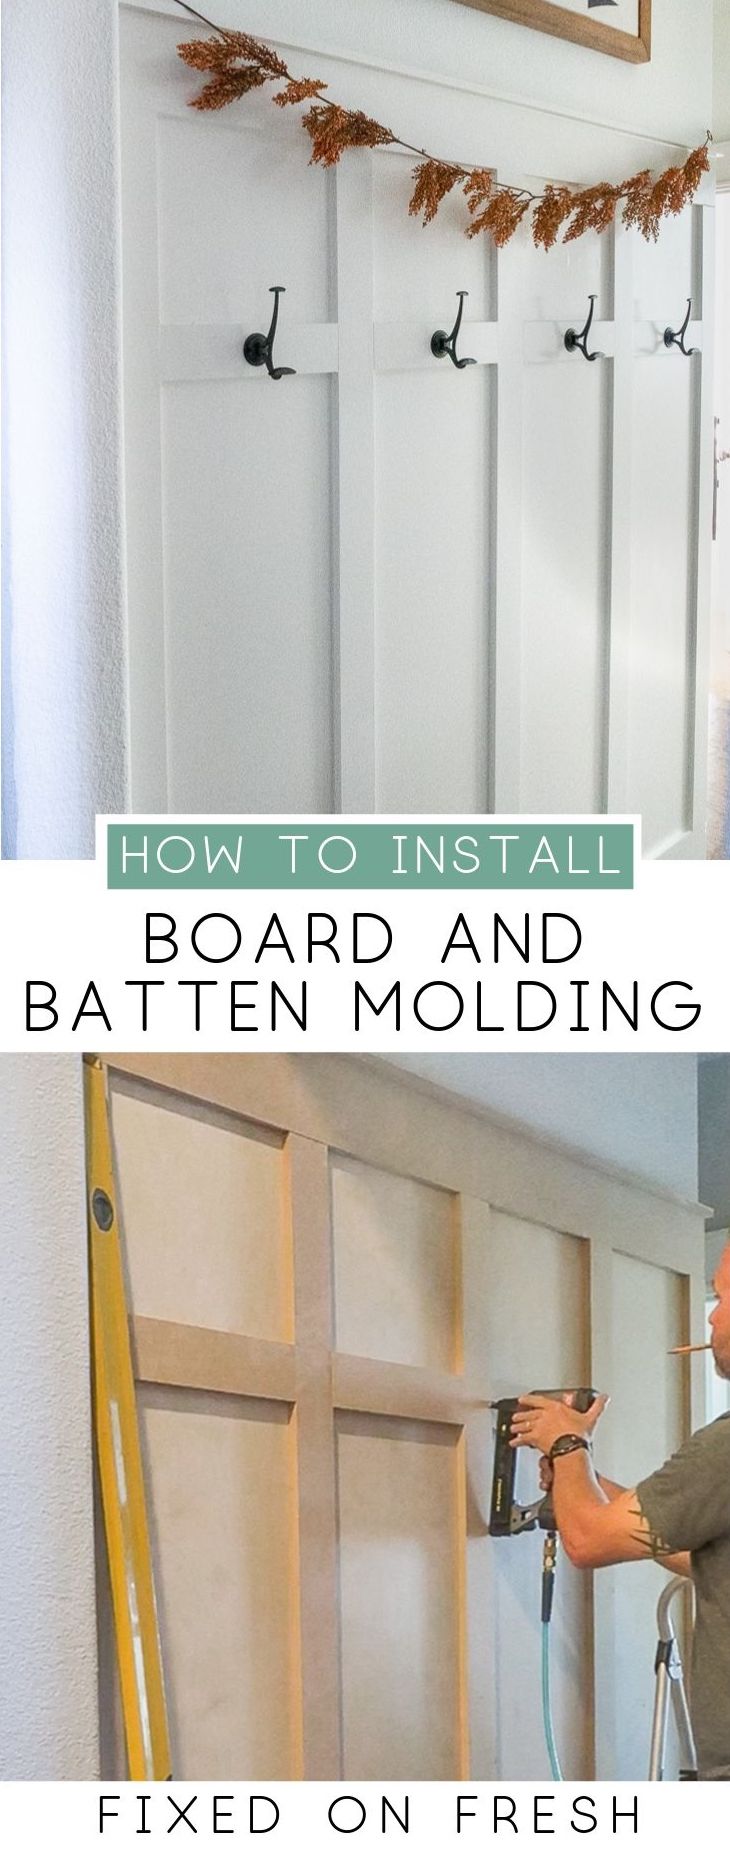
You know that wall you've been staring at? The one that needs a little something, or can serve a greater purpose? Installing some board and batten moulding may be exactly what you need to add a little style and some utility to an underused space.
STEP BY STEP INSTRUCTIONS FOR A 6-FOOT WALL OF MOLDING
COMPLETION TIME: 1-2 days | SKILL LEVEL: Moderate | TOTAL COST OF MATERIALS: $106
Let's assume you want to make a 6-foot wide section of board and batten molding for 9-foot ceilings (if you
MATERIALS & TOOLS NEEDED FOR BOARD AND BATTEN
For a full list of materials and tools, just expand the lists below. If you do projects like this a lot, you should already have a lot of it. But I like to get everything out and organized so there are no unplanned trips to the hardware store.
MATERIALS
- (2) 1"x6" MDF boards cut down to 70" ($18)
- (5) 1"x4" MDF boards cut down to 66 ¾" ($25)
- (4) 1"x4" MDF boards down to 13 7/16" (use scraps from the longer boards)
- (1) 1"x2" MDF board cut down to 70 ½" ($3)
- (2) 4'x8'x⅛" sheets of masonite cut down to these sizes: 35 ¼"x78" & 35 ¼"x34" ($16)
- (1) 10 oz. tube all-purpose latex caulk ($2)
- Spackle ($7)
- 120 grit sand block ($7)
- 1 gallon ultra white semi gloss paint with primer ($30)
- 2" 18g brad nails ($5)
- Hooks (optional) ($36)
TOOLS
- Power Saw (miter, circular, or table saw will work - or you can have the folks at the hardware store cut them down for you, but be REALLY sure of your measurements).
- Caulk Gun
- Caulk Finishing Tool
- Nail Gun
- Level
- Nail Setter
- Compressor
- Tape Measure
- 4-6" Paint Roller w/ Cabinet Roller Attachment
- Paint Brush
- Painter's Tape[/su_expand]
STEP 1: MARK YOUR MEASUREMENTS AND MAKE SURE EVERYTHING IS CUT ACC

It's not all that fun, and may not seem to be productive, but double checking your measurements is soooo worth it. For these reasons, and probably even more I'm not thinking of:
- You can see if you like the way the measurement suite your space. This is a customizable project, feel free to tweak according to your taste!
- You will be sure of where the boards are sitting, so you know where the gaps in the sheets of plywood or masonite can lie without being seen. This will also be where you want to nail in your masonite so you don't have to fill more nail holes.
STEP 2: CUT DOWN ALL YOUR MATERIALS
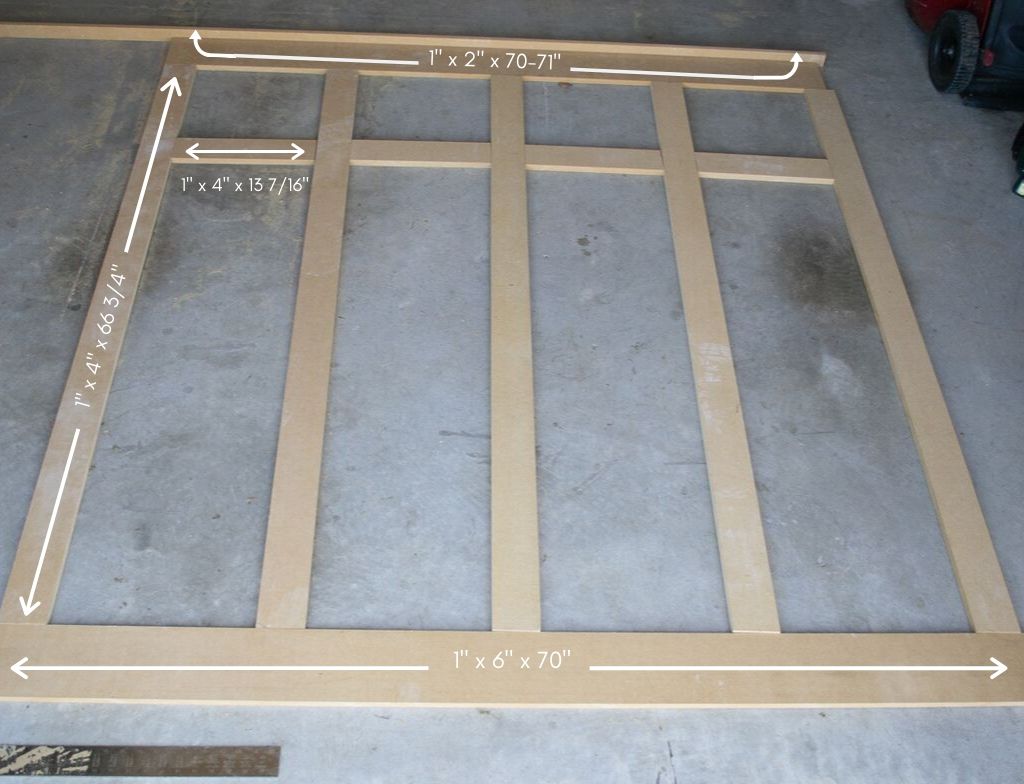
If you really are after a 6-foot section of board and batten, just follow the measurements listed above (also listed in the materials). The good news is, all the cuts are straight, so you don't have to worry about any angles lining up.
Once you've cut your boards down, lay them out and make sure everything lines up and will fit your wall.
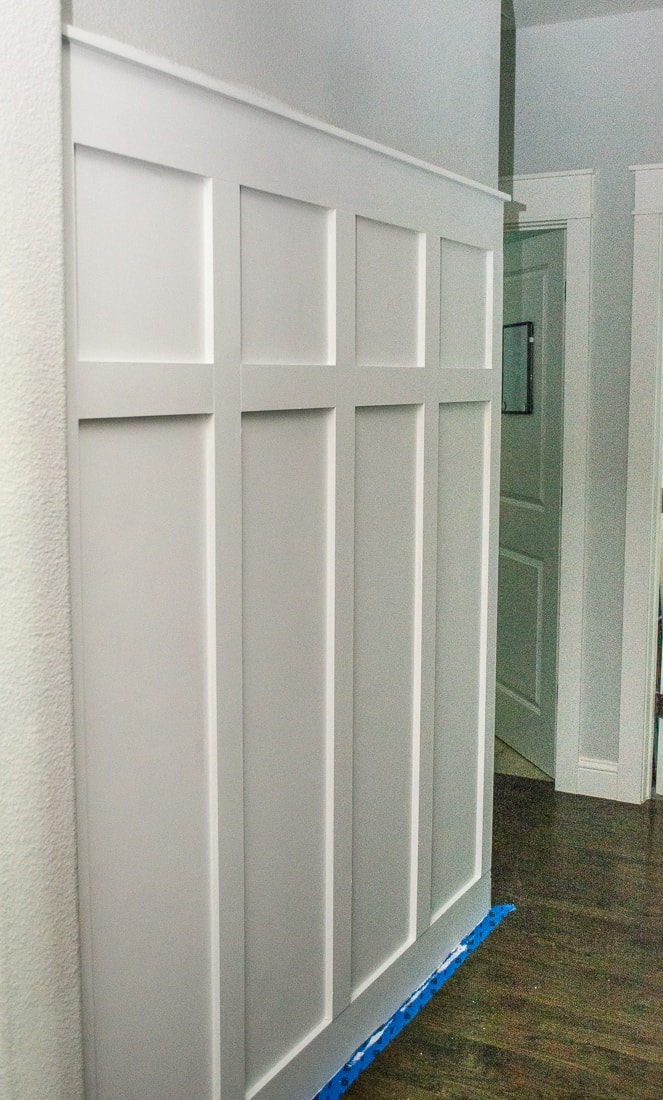
STEP 3: PREPARE THE WALL AND INSTALL THE MASONITE SHEETS
PREPARE THE WALL: First, you'll need to carefully take off the existing baseboards on your wall. We wanted to leave the surrounding molding intact to minimize any additional replacements.
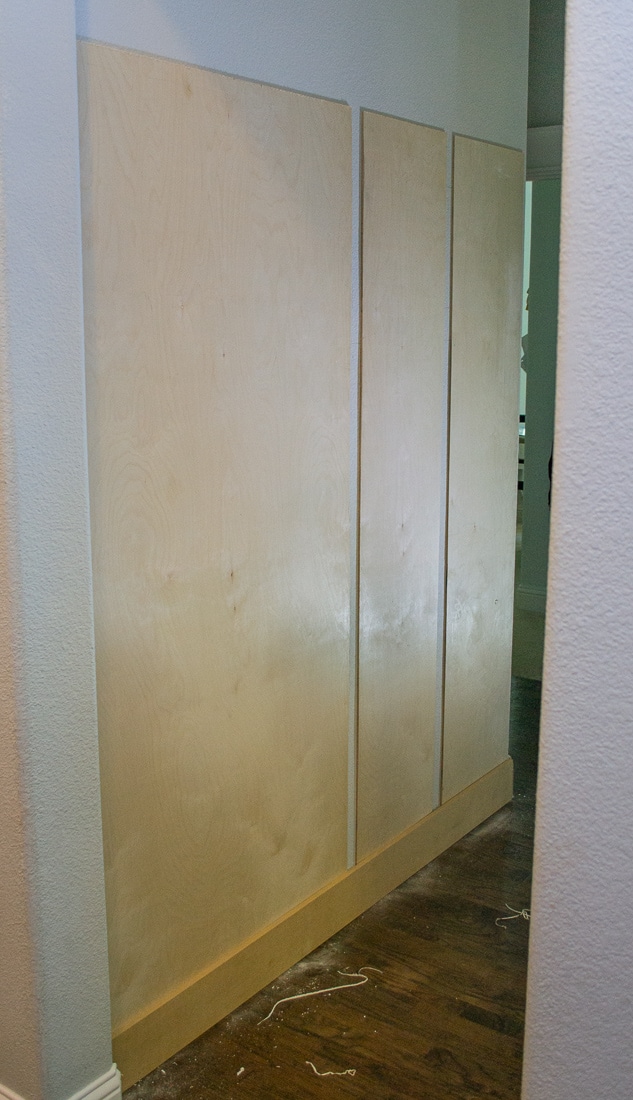
INSTALL THE MASONITE: Next, we installed the sheets of plywood or masonite on the wall to go behind the board and batten.
We used plywood that we had leftover from another project, which is why we have those gaps in the masonite. It was a "let's make this work" situation. However, plywood is a lot more expensive. If I were buying materials from scratch for this, I would get ⅛" masonite sheets for a fraction of the price ($8 vs. $35 per sheet).
To attach the sheets of masonite, nail it up in vertical rows where the boards are going to cover the nail holes. This is where having your vertical boards marked on the wall comes in handy.
Again , we had to use preexisting materials, so we had 3 strips instead of 2.
This is honestly the trickiest part. Once you get through this part, it's smooth sailing...that's a lie, but it's the most important part.
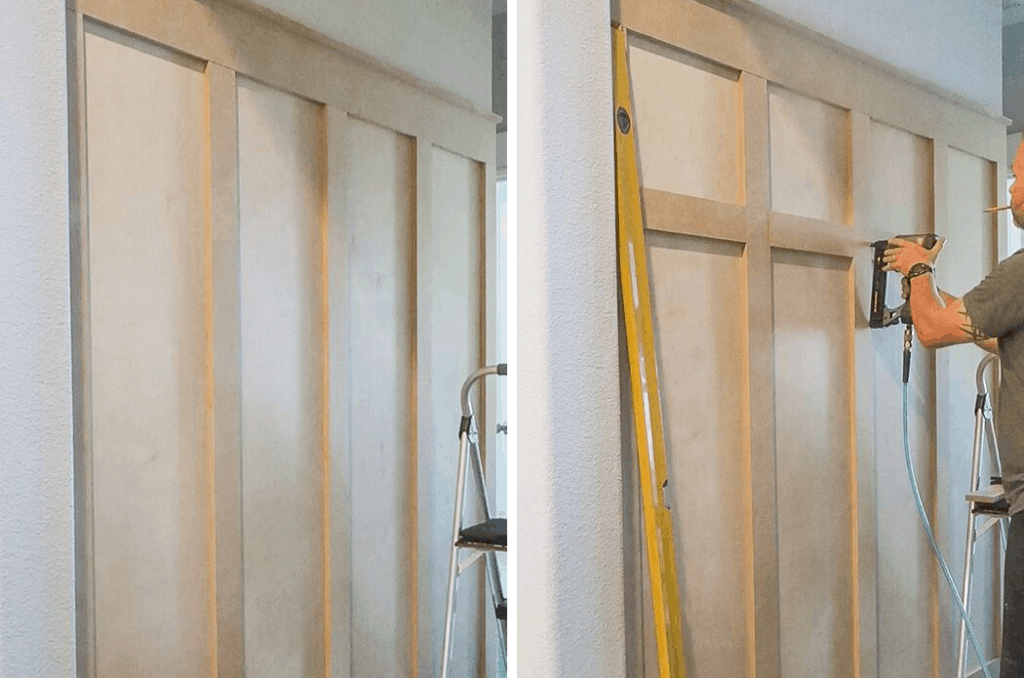
STEP 4: INSTALL REMIANING MOLDING
INSTALL THE BASEBOARD: Use one of the 1x6" boards as the new baseboard. Nail the board every 6 inches or so on top and bottom to secure it to the wall. (vertically level).
INSTALL THE VERTICAL BOARDS: We nailed up the long, 1x4" boards from left to right making sure each board is plumb (vertically level).
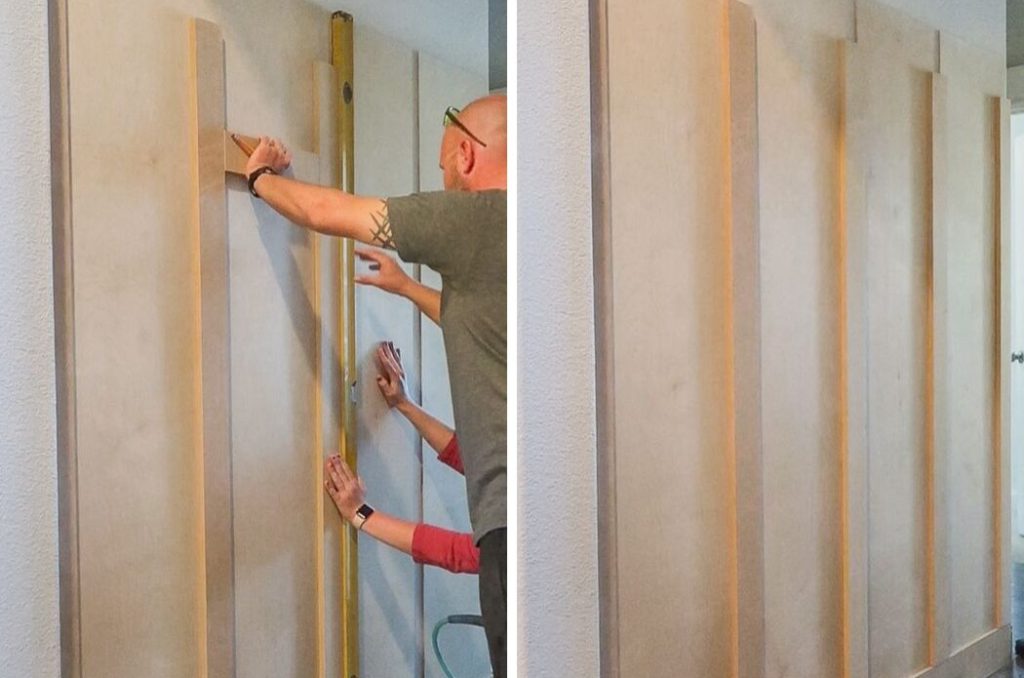
ATTACH THE HEADER AND CAP: Attach the
Over the header, lay the 1x2" board flat over the top of it and nail it from the top into the header board.
INSTALL THE
STEP 5: PREPARE THE MOLDING TO PAINT
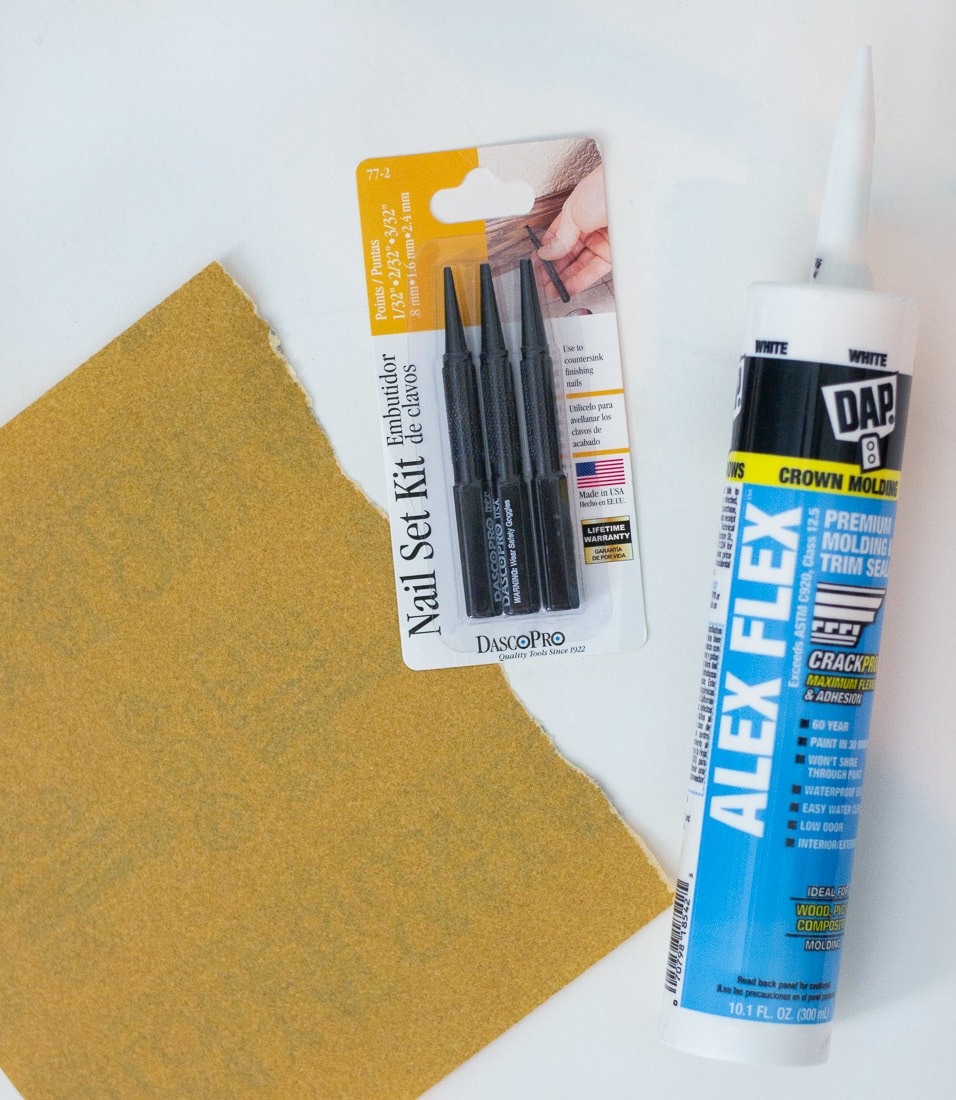
SET AND FILL NAIL HOLES: If there are any nails that didn't set into the wood and stick out, you'll need to set them into the wood with a hammer and a nail setter.
Once all the nails are set, you can putty all of them with spackle so that the nail holes won't show. Let the putty dry for 15-20 minutes before sanding.
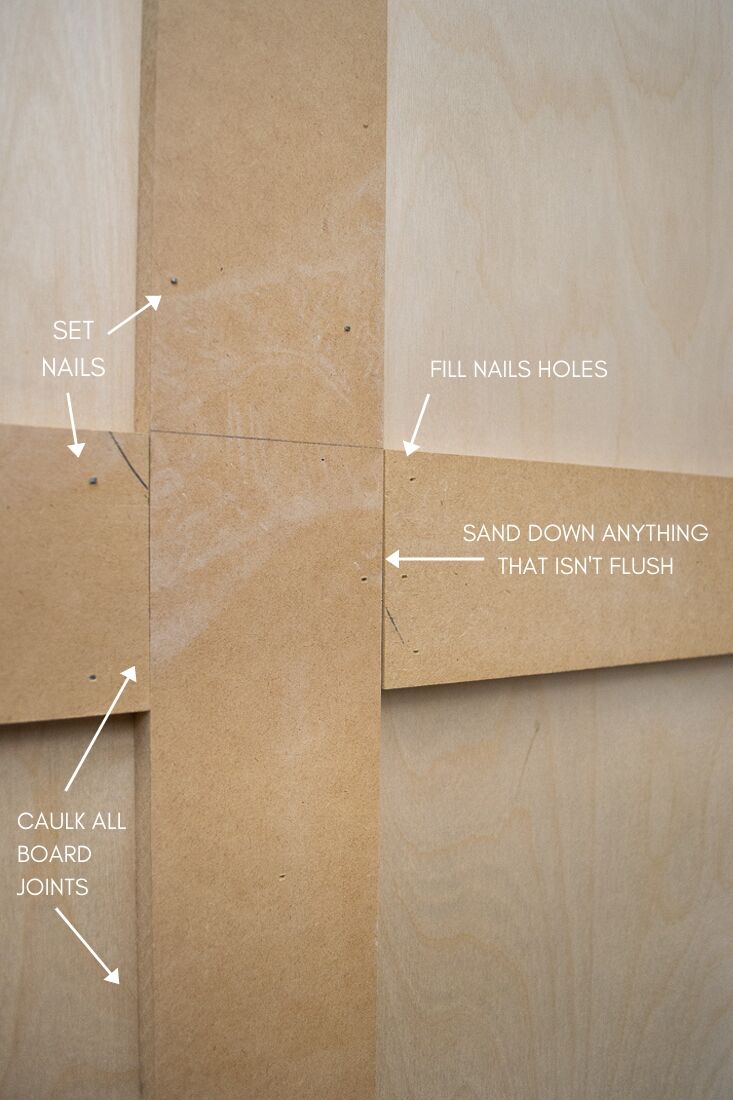
SANDING: Anything that isn't smooth will need to be sanded down. That includes the putty from filling the nail holes and any of the boards that aren't perfectly flush at the joins. Wipe down all of the trim after sanding to remove all the dust and debris before moving on to caulking.
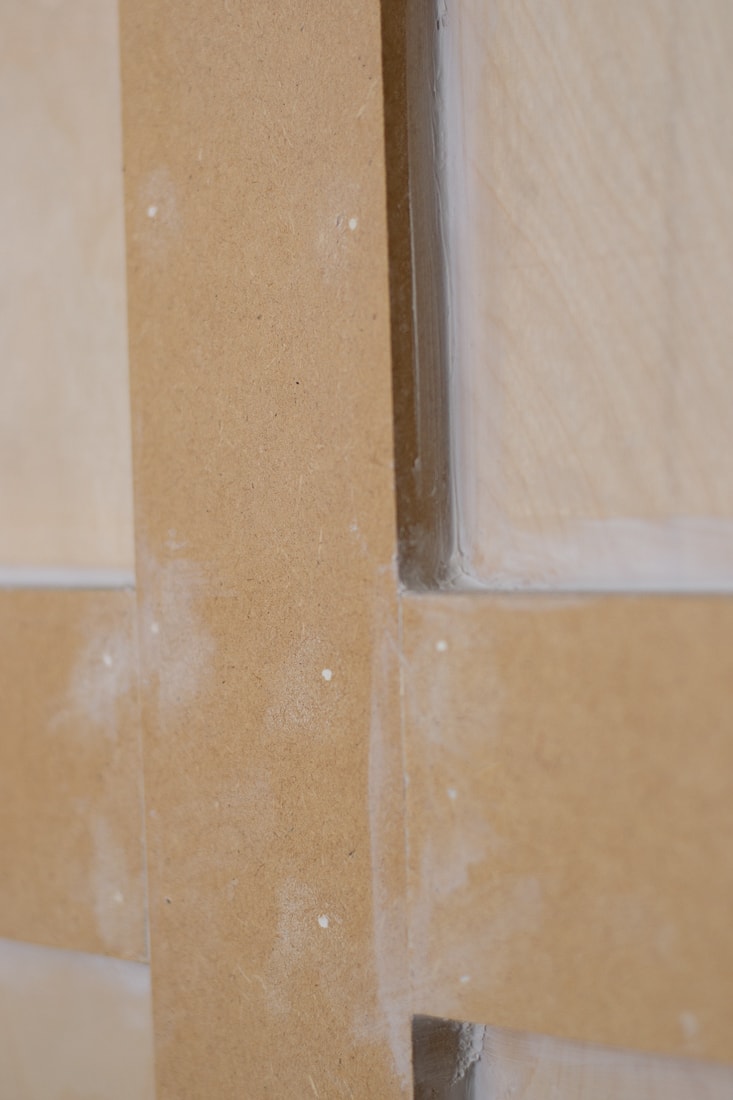
[su_highlight background="#afbcb2" color="#FFFFFF"]CAULK:[/su_highlight] Grab your caulk gun, caulk, caulk finishing tool and some painter's tape. Run a fine bead of caul along each board join and use a caulk finishing tool to smooth it out. If you're new to caulking, read this post before you start.
STEP 6: PAINT

The step
We used a 4" roller with a foam cabinet roller attachment to minimize any texture on the
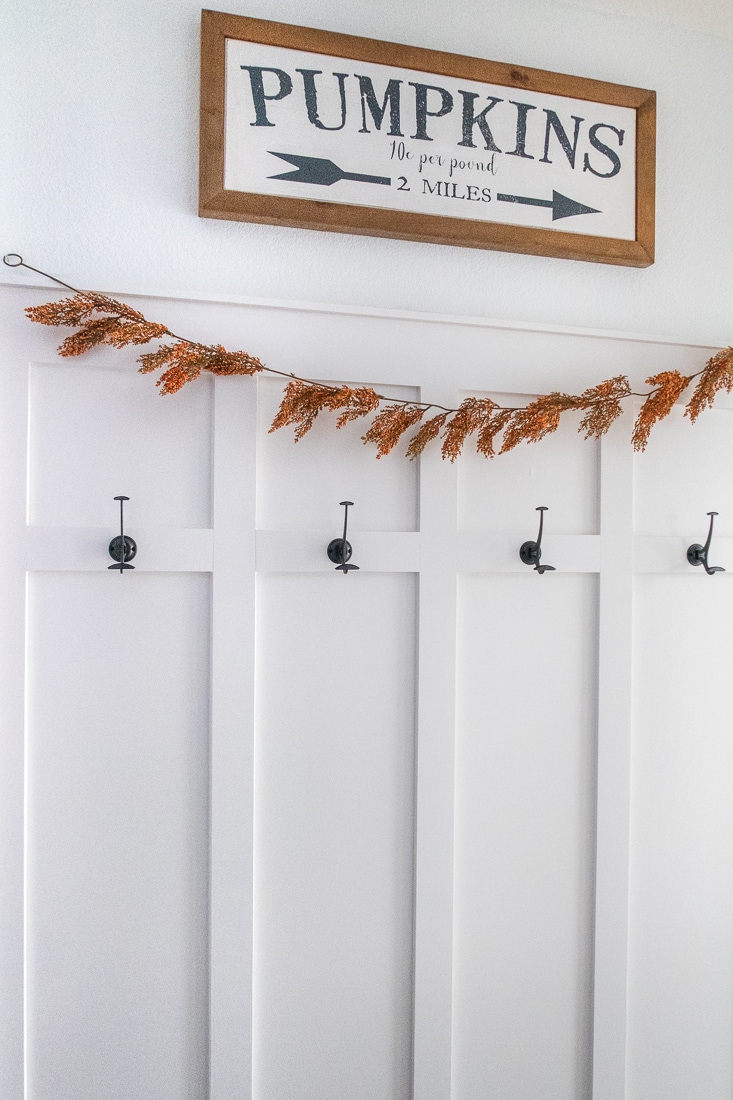
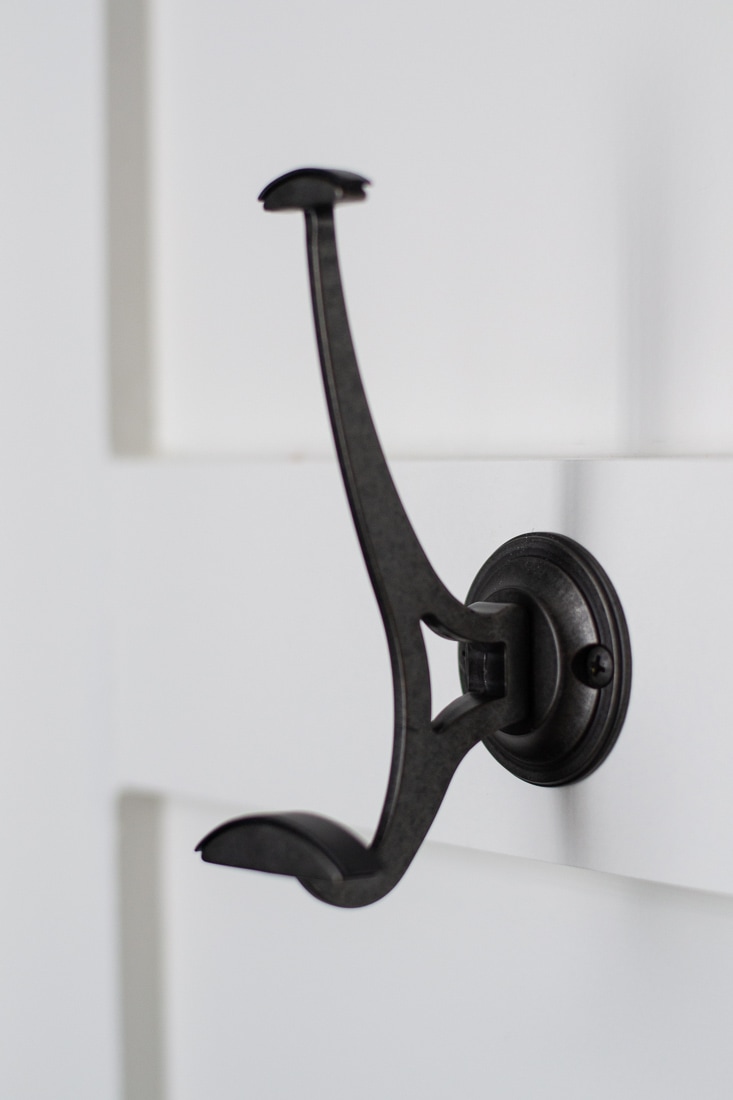
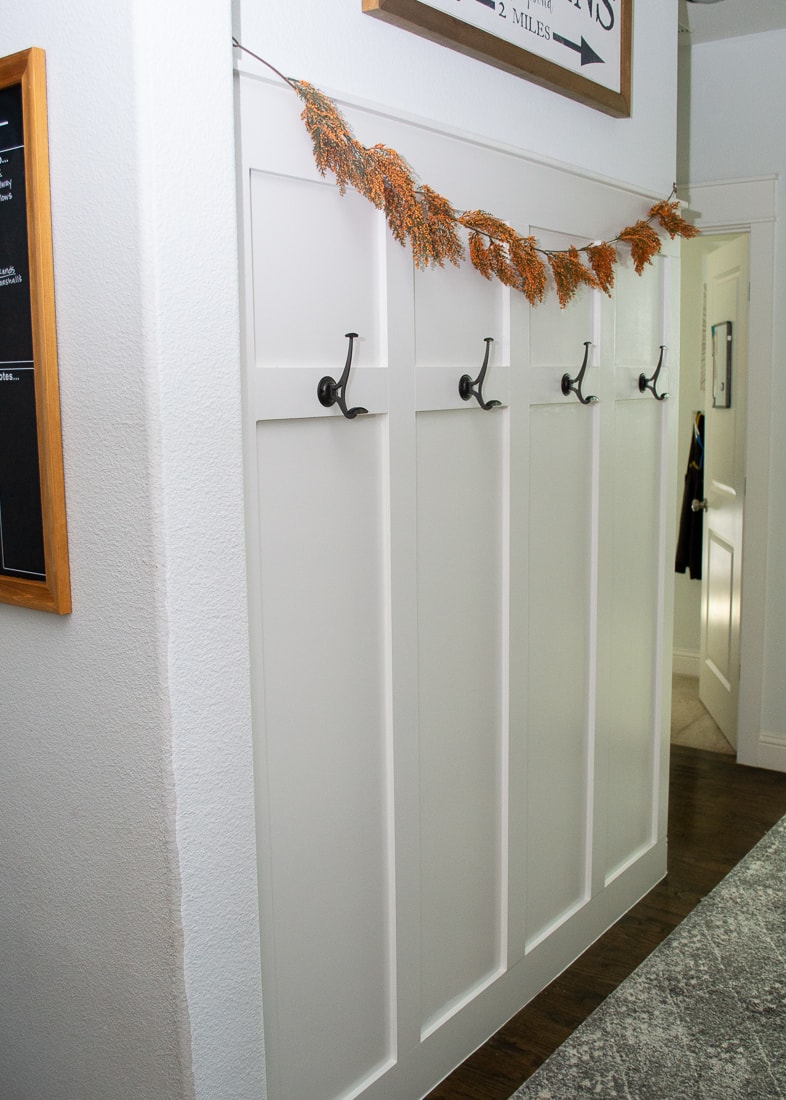
FINISHISHING TOUCHES
We wanted this space to act as sort of a mud room. The garage empties into this hallway so it was a good location to catch all of our stuff as we get into the house.
These hooks were $9 each at Target and matched our style perfectly. We chose to attach them in the center of each opening of the molding, rather than at the

MAKE IT YOUR OWN: HOW TO MEASURE TO MAKE YOUR OWN BOARD AND BATTEN WALL
How to measure your wall for board and batten
- MEASURE THE WALL WIDTH
Grab a measuring tape and measure the exact width. Here in Texas a lot of our homes have rounded corners, so we had to take about an inch and a half off the total width of the wall.
If we hadn't, the last vertical board would hang over and it wouldn't be a good look. I also wanted to bring the cap on the top over about half an inch, which we didn't want to hang over either.
So when I say to measure the full width, I mean measure to where you want the top cap to stop. For us, that was 69", as our wall was 70.5" - CALCULATE HORIZONTAL SPACING
I wanted the spaces between each vertical board to be as close to 12" as we could get. Now I need you to get your head in a math place.
If each of my "1x4"s are actually 3 ¼" wide, so the first thing you have to account for is the end pieces: 6.5".
Divide the remaining inches by 12, then subtract by 1. I was down to 62.5"/12 = 5.2 -1 = 4. It won't be exactly 12" between each, but it's as close as I was going to get.
So 4 openings means I'll need another 3 boards at 3 ¼" (which adds up to 9.75"). 62.5"-9.75" is 52 ¾" divided over 4 openings is 13 ⅛" between each vertical board. This will be the measurement of your horizontal spacer boards - ADJUST FOR YOUR HEIGHT
Our ceilings in the area are 9 feet (108"), and we chose 78" tall for the entirety of all the molding pieces. If your ceilings are shorter, you may want to adjust accordingly. For example, maybe bring it down to 70" for
8 foot ceilings. - CALCULATE VERTICAL BOARD LENGTHS
This one is way easier then figuring out the horizontal spacer board measurements. You base and header will be made of 1"x6" boards, which are actually 5 ¼".
With the two of those plus the header at ¾" thick, all you have to do to figure out your vertical board height is subtract your desired height by 11 ¼", so using my 78" example, my vertical boards were 66 ¾" long.
GET TO WORK

Now that you know how to install board and batten, is it something you'll take on at your house? You know it doesn't cost much, it can be done from start to finish in a weekend, and you don't need to make any complicated wood cuts.
Leave a Reply